Check Video Quality Before Joining a Google Meet Call
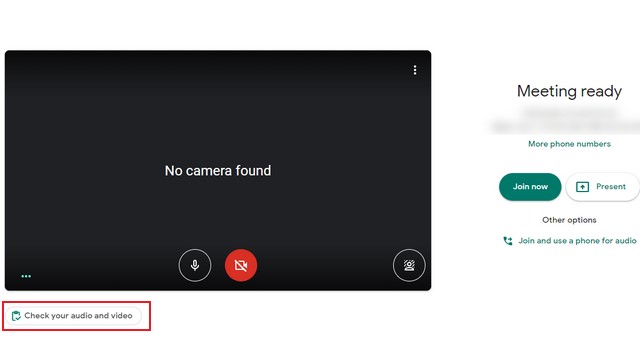
To access the green room, open Google Meet, and head to the waiting room. If you’re invited to a meeting, clicking on the invite link will give you access to this space. On the other hand, if you’re organizing the meeting, creating a new meeting brings the waiting room.
Once you’re here, you’ll notice a new ‘Check your audio and video’ button in the bottom left corner of the video feed. Click on it to open the green room.
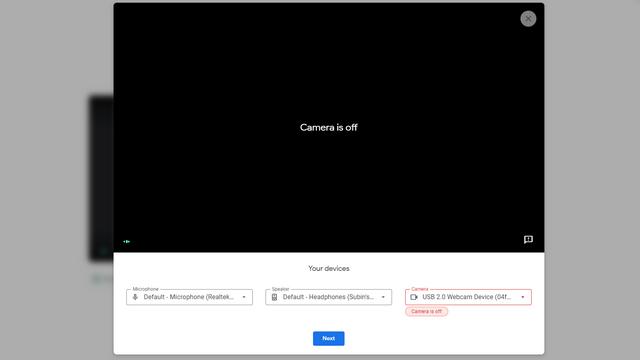
As soon as you open the green room, you’ll see separate sections for the microphone, speaker, and camera that indicate your default option. Here, you can click on any of these settings and switch to a different device. Once you’ve made sure that all these settings are in the appropriate device outputs, click on Next.
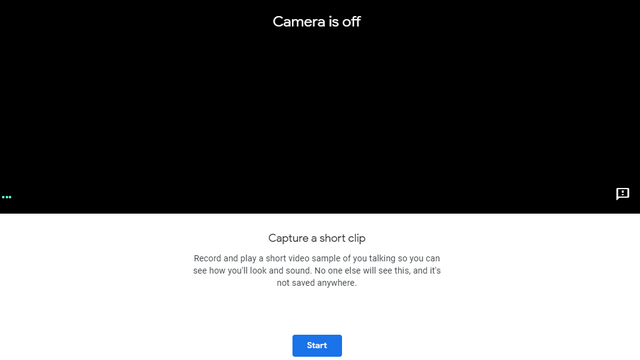
From this page, you can record a short clip of yourself to see how you’ll appear to everyone else in the meeting. Google ensures that this short clip isn’t saved anywhere and is visible only to you. Click on Start to record the clip.
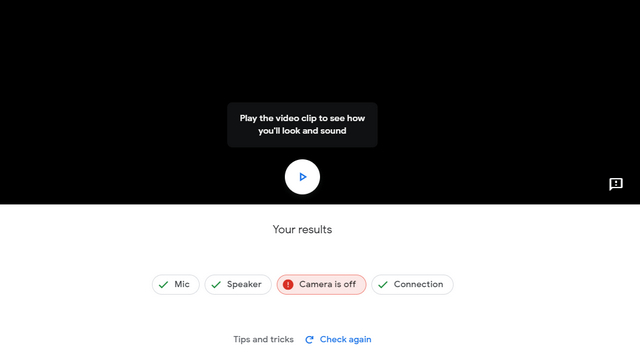
5. After a few seconds, you can play the recorded video clip. Below the clip, Google Meet will showcase your results, which you can use as a checklist for checking your video quality. As you can see, Google Meet pointed out that I’ve turned my camera off. There’s also a tips and tricks section where the company urges you to position yourself at the center of the camera and avoid bright lights behind you.
Troubleshoot Google Meet Issues Before Meeting
Although the introduction of Green Room is a subtle change, it should prove helpful to anyone relying on Google Meet for joining meetings. If you’re wondering how Google Meet’s features compare to other leading video conferencing platforms, check out our detailed comparison of Google Meet, Zoom, and Microsoft Teams. Also, if you like this nifty hack, don’t forget to check out our articles on automatically transcribing Google Meet calls and changing background during a Google Meet call. These tricks will surely improve your overall experience.


