Enable Microphone and GPU Acceleration in Linux on Chromebook (2021)
Here, we have mentioned two easy ways to turn on the microphone and GPU acceleration support in Linux on Chromebook. You can expand the table below and move to the relevant section easily.
Turn On Microphone Support in Linux on Chromebooks
You can enable the microphone in Linux on Chromebooks right now and for that, you don’t need to update to the Beta or Dev channel. The feature is available in the stable channel since Chrome OS 80 and now Google offers a user-facing option to turn on microphone support in Linux.
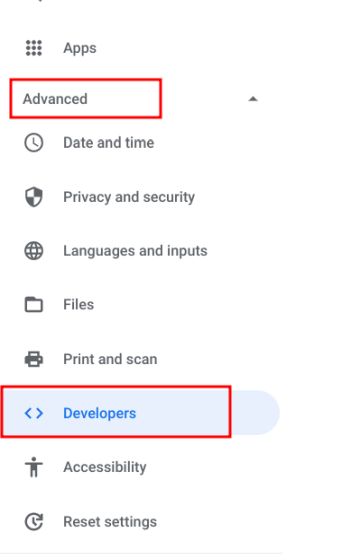
Once you have set up Linux on your Chromebook, open the Settings page and move to Advanced -> Developers in the left menu.
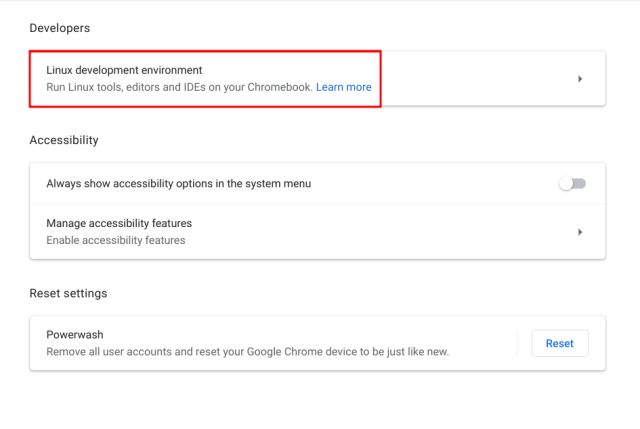
Next, click on “Linux development environment”.
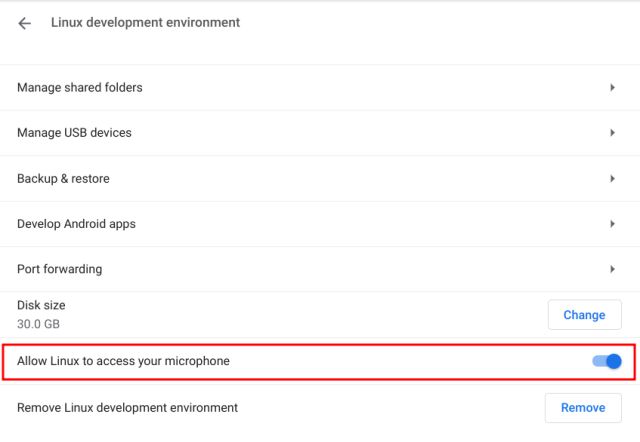
At the bottom, you will find “Allow Linux to access your microphone”. Enable it and that’s all.
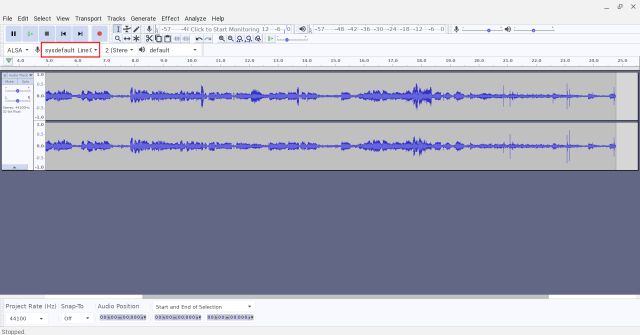
Now, open any audio-recording application. Here, for example, I have used Audacity, which is one of the best Linux apps for Chromebooks and it recorded my voice clearly which confirms microphone support in Linux on Chromebooks. Note: You might have to change the recording device to sysdefault: Line:0 in Audacity. For other applications, you don’t have to make any changes.
If the microphone is not working in Linux apps on your Chromebook then reboot your device. It will likely fix the issue.
Enable GPU Acceleration in Linux on Chromebooks
Before we begin, let me clarify that GPU acceleration has been added to almost all the Chromebooks by default since Chrome OS 81. The only caveat is that you need to upgrade the Linux container to the latest Debian Buster build. Here is how to go about it.
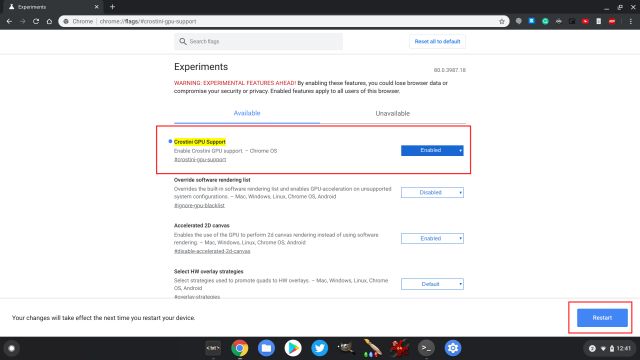
Open the Chrome browser and move to the Chrome Flags page.
After that, search for “Crostini GPU Support” and enable it from the drop-down menu. You can also directly open the dedicated flag from the below address. Now, click on the “Restart” button at the bottom.
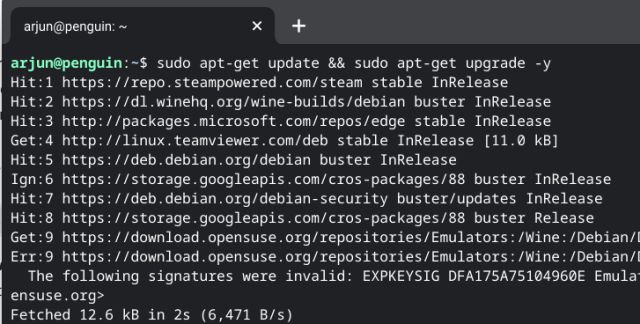
After the reboot, open the Linux Terminal and run the below command to update the packages and dependencies. Just copy and paste the command in the Terminal and hit enter. After that, it will update to the latest Buster build.
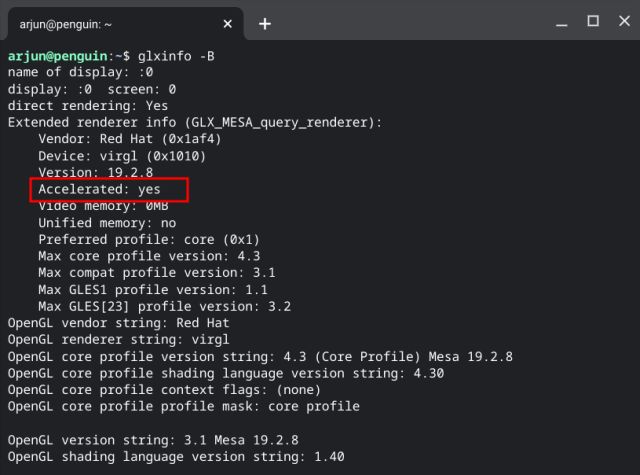
Once the packages are updated, run the below command to install the Mesa utility. It lets you know whether GPU acceleration has been enabled or not on your Chromebook.
Finally, to confirm if GPU acceleration has been enabled or not, open the Linux Terminal and run the command given below. If it mentions “Accelerated: Yes” then you are done. You can now play desktop-level Chromebook games and use graphics-intensive Linux apps on your Chromebook effortlessly. Enjoy!
Make Your Chromebook a Powerful Machine
So that was our short guide on how to enable microphone support and GPU Acceleration in Linux on Chromebooks. These were two of the highly-sought features from the creative and gaming community and Google has finally walked the talk. With the recent addition of Android app sideloading on Chromebook, Google has made amply clear that it’s taking the Chrome OS platform seriously. Now, all we need is webcam support in Linux on Chromebooks. As and when that happens, we will definitely let you know. Anyway, that is all from us. So what do you think of these two new additions to Chrome OS? Let us know in the comment section below.